
Upgrade Your Garage Systems Today For Maximum Organization And Efficiency
You pull into your garage after a long day, and a garage system lifts the door quietly, turns on the lights automatically, and secures everything behind you. This coordinated setup of opener, tracks, springs, and sensors works by converting motor power into smooth, balanced movement along steel rails. It gives you safety, convenience, and peace of mind by eliminating manual lifting and keeping your home protected.

Core Components That Make Up a Modern Garage System

A modern garage system is built upon three core components: the opener, the track and spring assembly, and the door panels with their integrated safety sensors. The opener acts as the system’s brain, coordinating the motor and smart controls. The track and torsion spring assembly provides precise lifting force and smooth travel, directly affecting longevity. The door panels themselves, often insulated steel, must interface flawlessly with the seals and sensors. Question: What single component most directly affects the door’s balance and lifespan? Answer: The torsion springs, which must be precisely matched to the door’s weight for safe, reliable operation. Without these three elements in perfect sync, the entire garage system fails to provide security, convenience, and durability.
How the Track and Rail Configuration Affects Door Movement
The track and rail configuration dictates every aspect of a garage door’s trajectory, from the initial lift to its final stored position. A precisely aligned curved track ensures a smooth transition from vertical to horizontal travel, preventing jerky movements that strain the opener. The rail system controls the door’s track alignment for smooth door travel, as even a slight deviation forces the wheels to bind, creating friction that slows movement and causes premature wear. In systems with a low-headroom track, the door must bend sharply to fit a shallow ceiling, demanding a different operational path than a standard-radius configuration.
- Vertical track sections guide the door’s straight upward lift, while horizontal sections determine its stored height and ceiling clearance.
- A correctly angled track reduces counterbalance tension requirements, making manual operation easier.
- Bent or misaligned rails cause the door to shudder or stall, directly compromising the smooth roll of the movement.
Understanding Torsion vs. Extension Spring Mechanisms
Understanding the difference between torsion and extension springs is key to knowing your garage system. Torsion springs, mounted above the door, twist to lift the weight, offering smoother operation and longer life. Extension springs, stretching along horizontal tracks, pull the door up but can be more dangerous if they snap. For safety and balance, torsion spring mechanisms are generally preferred in modern setups. Extension springs require safety cables to prevent injury.
Torsion springs twist above the door for controlled lifting; extension springs stretch alongside for simpler, but less safe, operation.
Why the Opener Motor Type Matters for Daily Use
The opener motor type directly dictates your daily experience with noise, speed, and reliability. A chain-drive motor is harsh and loud, jarring the door open and causing vibrations that disturb adjacent living spaces. A quieter, belt-driven motor eliminates that racket, ensuring smooth, near-silent operation even when bedrooms are nearby. A DC-powered motor with soft-start and soft-stop technology prevents the door from slamming, reducing wear and extending lifespan. Why does motor type matter for daily use? Because a motor’s design determines whether you hear a disruptive clatter or a whisper, and whether the door opens slowly for safety or quickly for convenience—directly impacting your household peace and door longevity.
Key Features to Look for When Choosing Your Setup
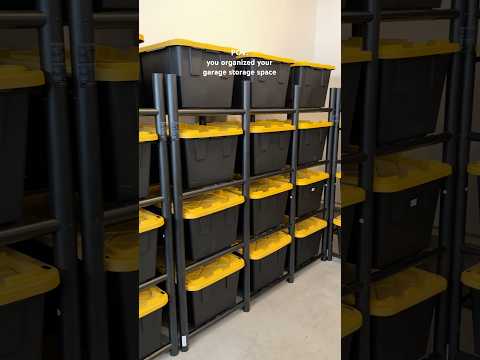
The heart of any garage system is modular storage, letting you reconfigure shelving and hooks as your tools multiply. I’ve watched a friend’s dream setup turn chaotic because he ignored weight ratings on slatwall panels, shelves bowing under engine blocks they weren’t built for. A system that forces you to plan every bracket placement before you drill is a system that will silently resent your last-minute purchases. Look for quick-lock flooring tiles that drain oil spills automatically, and a ceiling-mounted overhead rack that doesn’t require a step stool taller than your shop stool to reach. Swappable drawer inserts for socket sets save you from digging through a pile of loose hardware on a greasy concrete slab.
Battery Backup Capabilities and Power Outage Protection
A power outage leaves a standard garage system inoperable, trapping vehicles inside. For true protection, prioritize a model with an integrated battery backup system that automatically activates, allowing multiple open/close cycles even without mains power. The battery type matters: sealed lead-acid is common, but lithium-ion packs offer longer lifespan and faster recharge. Ensure your chosen system signals a low battery well before failure. Testing the backup function monthly is essential, as a dead battery offers no actual protection during an outage.
- Verify your system supports a learn more battery backup, as not all models do.
- Check the number of full open/close cycles the battery can provide (typically 1–4).
- Confirm the backup recharges automatically when power returns.
- Ensure the backup works with a manual release in case of total failure.
Smart Home Integration Options for Voice and App Control
When picking your garage system, focus on smart home integration options for voice and app control that fit your existing ecosystem. Ensure the opener supports native compatibility with platforms like Amazon Alexa, Google Assistant, or Apple HomeKit for seamless voice commands. For app control, look for reliable geofencing that automatically closes the door when you leave, and push notifications for status updates. Avoid systems that require a separate hub unless you already own one. A dedicated smartphone app with a clean interface makes scheduling closures and checking history effortless.
Safety Sensors and Auto-Reverse Functions Explained
Safety sensors and the auto-reverse function form the core of a modern garage system’s fail-safe operation. Two infrared sensors, positioned near the floor on each track, project an invisible beam across the opening. If a person, pet, or object breaks that beam during descent, the system instantly halts and reverses direction. The auto-reverse mechanism also activates when the door meets resistance exceeding a calibrated threshold, preventing crushing force. These features are not optional add-ons but essential, code-mandated protections that respond in milliseconds to avoid accidents.
- Sensors must stay perfectly aligned and clean; misalignment or dirt blocks the beam, stopping the door.
- Test monthly by placing an object like a cardboard box in the door’s path; it should reverse immediately upon contact.
- If the door reverses without visible obstruction, adjust the force sensitivity setting on the opener unit.
Practical Tips for Getting the Best Performance
For optimal garage system performance, regularly lubricate all moving parts—chains, rollers, and hinges—with a silicone-based spray, not grease, to reduce friction and noise. Test the auto-reverse function monthly by placing a block in the door’s path; if it fails to reverse, adjust the force and travel limit settings on the opener. Q: How often should I check door balance? A: Disconnect the opener and manually lift the door halfway; if it stays put, balance is correct, preventing motor strain. Finally, tighten all hardware and inspect weatherstripping for gaps to maintain smooth operation and energy efficiency.
How to Match Insulation Levels to Your Climate and Workshop Needs
To match insulation levels for your garage system, first assess your local climate zone, using R-value targets that increase with colder winters or hotter summers. For a workshop, balance thermal resistance with activity needs: a woodshop generating dust may require sealed insulation to prevent particle infiltration, while a welding station demands fire-resistant materials like mineral wool. Follow this sequence:
- Determine your climate’s recommended R-value for walls and ceiling (e.g., R-13 to R-21 for moderate climates, R-30+ for extremes).
- Identify workshop heat sources or cold exposure, such as a kiln or unheated storage area.
- Select insulation type (spray foam for airtightness, batts for cost-efficiency) that matches both the R-value and your workshop’s moisture or spark risks.
This ensures climate-optimized insulation for workshop efficiency, preventing energy loss without compromising function.

Choosing the Right Door Material for Durability and Maintenance
For optimal durability and minimal maintenance, selecting a steel or fiberglass garage door is a practical choice. Steel doors resist warping and cracking but require a rust-resistant coating and periodic touch-ups to prevent corrosion, especially in humid climates. Fiberglass offers excellent resistance to salt air and dents, though it may become brittle in extreme cold. Avoid wood if you prioritize low upkeep, as it demands regular sealing against moisture and insects. Evaluate your local weather conditions and intended usage to balance longevity with care effort.
Maximizing Storage with Ceiling-Mounted or Wall-Mounted Organizers
To truly unlock your garage’s potential, you must look up. **Ceiling-mounted racks** can leverage overhead voids to store bulky items like kayaks, ladders, or seasonal bins, freeing critical floor space. Wall-mounted slatwall panels or pegboards similarly transform vertical surfaces into dynamic storage for tools and hardware, keeping everything visible and accessible. For optimal performance, always anchor fixtures into studs and use weight-rated hardware to prevent failure. This targeted approach eliminates clutter without sacrificing square footage, making every cubic inch of your system work harder.
| Mount Type | Best For | Key Tip |
|---|---|---|
| Ceiling-Mounted | Oversized, seasonal items | Measure clearance for vehicle parking |
| Wall-Mounted | Frequently used tools & supplies | Use slatwall hooks for flexible reconfiguration |
Common User Questions About Operation and Maintenance
Users frequently ask how often to lubricate a garage system’s chain and tracks—typically every six months with a lithium-based grease prevents wear on high-tension springs. They also query why the remote fails intermittently; this almost always points to faulty photocell alignment or dead backup batteries, not the motor itself. A common concern about reversing after hitting an obstruction is solved by adjusting the force sensitivity limit on the opener unit. One overlooked cause of erratic travel is a corroded ground wire at the motor head, not the sensors. For cleaning, stick to a damp cloth on tracks and avoid any petroleum-based lubricants near drive belts, which degrade rubber components swiftly.
What to Do When the Door Stops Midway or Reverses Unexpectedly
When the door stops midway or reverses unexpectedly, first check the safety sensor alignment—dirty or misaligned sensors near the floor are the most common cause. Clean sensor lenses with a soft cloth and verify the indicator lights are steady. If the door reverses without an obstruction, inspect the force settings on the opener; reduce the travel limit or adjust the force sensitivity per the manual. Lubricate the tracks and rollers to rule out binding. For intermittent stalling, test the photo-eye wiring for damage. Always disconnect power before handling wiring or motor adjustments. If the problem persists, the logic board may need replacement.
How Often Should You Lubricate Moving Parts and Which Lubricants Work Best
Lubricate moving parts on your garage door system every three to six months, or more frequently in dusty or high-use environments. For best results, apply a white lithium grease or silicone-based lubricant to the chain, rollers, hinges, and springs—never use WD-40, which is a cleaner, not a lubricant. Proper lubrication schedule prevents wear and noise. Follow this sequence:
- Clean tracks and parts with a dry cloth.
- Spray lubricant directly on rollers and hinges.
- Apply a thin coat to the chain or screw drive.
- Wipe away excess to avoid attracting dirt.
Troubleshooting Remote or Keypad Connectivity Problems

When addressing garage door remote connectivity failures, first verify the keypad or remote has a fresh battery, as low voltage is the most frequent cause. Ensure you are within the opener’s 30–50 foot range and that no metal obstructions or interference sources, like nearby Wi-Fi routers, are present. For hardwired keypads, check the terminal screws for corrosion and loose wiring at both the keypad and motor unit. Reprogramming the device to the opener by clearing the receiver’s memory and re-entering the PIN or pairing sequence often resolves intermittent disconnects.
Troubleshooting Remote or Keypad Connectivity Problems: Replace batteries, clear range obstructions, and reprogram the device to restore reliable operation.
Enhancing Your Garage System for Convenience and Security
The late-night rain drummed on my car roof as I fumbled for the remote, a familiar dread sinking in. That’s when I finally upgraded to a smart garage system, and the change was immediate. Integrating a smart hub with my phone and vehicle GPS eliminated the guesswork, automatically closing the door behind me and triggering the lights as I pulled in. The real game-changer, however, was the battery backup and rolling code technology I installed.
It’s the quiet confidence of knowing a power outage won’t trap my car, while constant code-hopping blocks signal thieves before they can scan.
Now, with motion sensors alerting me to any unexpected movement and a keypad for the kids, the garage feels less like a storage gap in my home’s security and more like a seamless, protected entry I control without a second thought.
Adding Keyless Entry Pads and Remote-Controlled Lighting
Adding keyless entry pads to your garage door eliminates the need for physical keys or remotes, allowing access via a secure PIN. This feature prevents lockouts and provides temporary codes for guests or service providers. Pairing this with remote-controlled lighting enhances both convenience and security. You can program lights to activate automatically when the door opens, illuminating the garage interior and driveway. This deters intruders and improves visibility at night. For implementation, follow this sequence: install the keyless entry pad by linking it to your opener, then set up compatible smart bulbs or switches, and lastly integrate both with a hub or app for scheduled or triggered lighting.
- Mount the keyless pad at a convenient height near the garage entrance and program it to your opener.
- Install remote-controlled light fixtures or smart bulbs in the garage and on the exterior.
- Configure the lighting system to respond to the garage door opener’s signal or a separate remote.
Setting Up Real-Time Alerts and Activity Logs via a Smart Hub
Integrating a smart hub allows you to configure customized activity logs and real-time alerts for your garage system. You can set push notifications for specific triggers, such as the door opening at an unusual hour or remaining ajar for a set duration. The hub logs every open and close event, timestamping each action and linking it to the user who triggered it. This enables you to verify if a door was left open after a delivery or when a family member arrived home. You can fine-tune alert sensitivity to avoid false alarms while ensuring you are immediately notified of significant events.
Q: Can I review past garage activity if I miss a real-time alert?
A: Yes, the smart hub stores a chronological log of all events, including timestamps and user IDs, allowing you to retroactively audit every door movement.
Installing Backup Locking Mechanisms for Extra Theft Deterrence
Install a secondary slide bolt or padlock hasp on the interior garage door track to physically block the door from being forced open. This redundant garage door lock works independently of the primary opener, foiling thieves who bypass the main release mechanism. For manual reinforcement, install a T-handle lock that engages metal rods into the door frame. Ensure the backup lock uses a hardened steel shackle and tamper-resistant screws to resist cutting. Test the mechanism monthly to confirm it does not interfere with normal operation but engages fully when set.
A backup locking mechanism physically secures the garage door against bypass attacks, providing a critical second layer of theft deterrence.